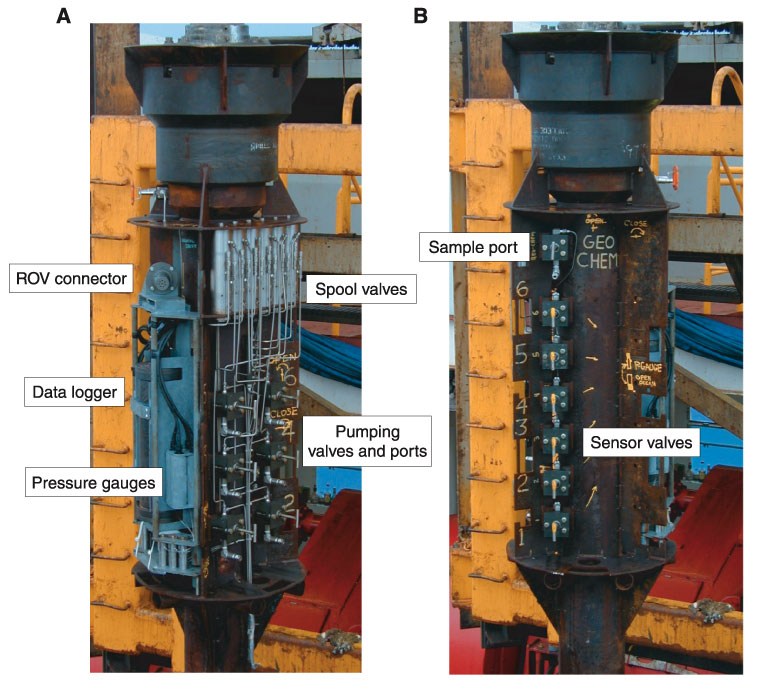
Figure F10.
Photograph of ACORK head showing the three instrument bays as identified in Figure
F11
.
A.
Bay #3 on left and #1 on right.
B.
Bay #2.